
Finishing


Finally, the last and most satisfying phase of refinishing our floors. The final rounds of sanding were bittersweet. This is what the floors originally looked like when the home was first built and before they were treated with a thick, dark lacquer.
Again, you can see the lovely plywood used in the upstairs as a filler.
 We decided to go with a natural, water-based polyurethane with no added tint. The previous homeowner recommended we use Varathane brand (now owned by Rust-oleum). He said it was by far, the easiest to work with and was a self-leveling, long-lasting hard finish. I was absolutely clueless what any of that meant anyways but sure enough, Varathane receives glowing reviews online and I am glad I went with them. You can also see all the different products you'll need to ensure a professional looking, refinished floor.
You'll need the following:
Varathane Satin Water-Based Diamond Polyurethane Finish (1gl per room)
Pole Longarm Extension (multi-purpose tool: sanding/finishing/painting/drywall!)
Plastic Pole Sander (cheap, plastic ones work just fine)
Varathane Applicator (go high quality on this so you don't see little fibers everywhere)
Tack Cloth (Pack of 6)
3M Sanding Screens (100 or 220 grit)
Wooster Shortcut Angle Brush (I just LOVE these brushes for everything)
Knee Pads or Thick Cardboard
New Pair of Sythentic Socks (non-cotton)


The Process:
So I'm not sure if I have any photos of the process of actually applying the floor finish. At this point, I believe my wife was busy at the old apartment boxing things up or working on grading papers. In any case, I'll detail the tedious/perfectionist steps I took to ensure the best results possible.
You'll be excited at this point but if you haven't already -- fill in any holes now. Don't use the sandy wood filler stuff from Minwax, buy the smooth puddy version. You'll fill in random nail and staple holes from the carpet strips. Don't worry about any gaps in the flooring but you may want to take a flat-head screwdriver and the shop-vac back out to clean them out now depending mostly on how gross it looks.
The biggest thing is being patient and allowing enough time on a Saturday or Sunday to have the whole day to work on this project. That includes going out to lunch between coats. I decided to split my time between the upstairs and downstairs and utilize my time equally between the two.
First, you'll need to shop vac the whole room. See those curtains in the photos? They are COVERED in fine wood dust. See all the wood trim? See the radiators? Dust everywhere. Shop-Vac everything and take everything down. You'll be thankful you did. After vacuuming, you can slip on your knee pads or find a piece of forgiving thick cardboard to spend a good deal of time on the floor. You'll be using the mineral spirits and your tack cloth on the whole room. Starting at the corner and slowly work make passes across the whole room top to bottom. After each pass, you'll need to shake out your tack cloth in a designated corner and re-fold it when necessary.
 After that, you can start pouring! I just dumped globs right on the floor and worked it in. Do your best to ensure you're working with the wood grain and evenly spread it out. There's some debate on the internet regarding how many coats you should add and how thick each coat should be. I went with four thin coats and a thicker one to finish.
See that line? We couldn't get it out - maybe a piano was slid across the floor at one point? Who knows. By the way, something I didn't think of at the time was what to put on my feet? My feet might as well be tack cloths because they picked up everything. I opted to use sacrifice some synthetic socks for the sake of the project -- cotton ended up sticking and leaving threads.

 Now it was really starting to look like home. We even moved the bed upstairs and decided to spend our first night together in the house.
  Warm and inviting
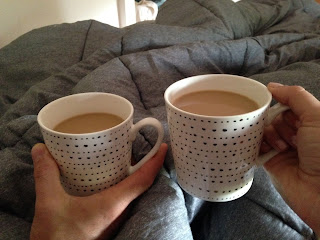 Morning coffee
Knee Pads or Thick Cardboard
New Pair of Sythentic Socks (non-cotton)


The Process:
So I'm not sure if I have any photos of the process of actually applying the floor finish. At this point, I believe my wife was busy at the old apartment boxing things up or working on grading papers. In any case, I'll detail the tedious/perfectionist steps I took to ensure the best results possible.
You'll be excited at this point but if you haven't already -- fill in any holes now. Don't use the sandy wood filler stuff from Minwax, buy the smooth puddy version. You'll fill in random nail and staple holes from the carpet strips. Don't worry about any gaps in the flooring but you may want to take a flat-head screwdriver and the shop-vac back out to clean them out now depending mostly on how gross it looks.
The biggest thing is being patient and allowing enough time on a Saturday or Sunday to have the whole day to work on this project. That includes going out to lunch between coats. I decided to split my time between the upstairs and downstairs and utilize my time equally between the two.
First, you'll need to shop vac the whole room. See those curtains in the photos? They are COVERED in fine wood dust. See all the wood trim? See the radiators? Dust everywhere. Shop-Vac everything and take everything down. You'll be thankful you did. After vacuuming, you can slip on your knee pads or find a piece of forgiving thick cardboard to spend a good deal of time on the floor. You'll be using the mineral spirits and your tack cloth on the whole room. Starting at the corner and slowly work make passes across the whole room top to bottom. After each pass, you'll need to shake out your tack cloth in a designated corner and re-fold it when necessary.

See that line? We couldn't get it out - maybe a piano was slid across the floor at one point? Who knows. By the way, something I didn't think of at the time was what to put on my feet? My feet might as well be tack cloths because they picked up everything. I opted to use sacrifice some synthetic socks for the sake of the project -- cotton ended up sticking and leaving threads.
So, on the can it will give you recommended drying times between each coat. Again, humidity can play a big role. After completing this process in the upstairs and eating lunch, it was time to apply the second coat downstairs. This is where my perfectionist/OCD tendancies came into play. You don't HAVE to sand between coats. Especially if you're going to put on thin ones but I did anyways. I took a super fine drywall sanding screens and swept the floors with them. Now I had to repeat the whole tack cloth/mineral spirits process over again. I just felt like this would help to acheive the best floor possible. In hindisght, I would recommend maybe one sanding in the middle coats.
I'm glad I split my time between rooms because by the time I was done sanding and snacking downstairs, it was time to re-apply the next coat upstairs. Overall, I think it turned out fantastic. I'd recommend waiting at least two days if you have time and it hasn't been especially humid before you start moving furniture into place. This stuff hardened up really nice but I still wouldn't go throwing down any rugs for a while.

 Now it was really starting to look like home. We even moved the bed upstairs and decided to spend our first night together in the house.
  Warm and inviting
 Morning coffee


